Best Way to Clean Grout in the Shower: A Complete Guide to Deep, Safe Grout Cleaning
Introduction: Best Way to Clean Grout in the Shower
Best Way to Clean Grout in the Shower: Cleaning shower grout isn’t just about grabbing the harshest cleaner you can find and scrubbing away like there’s no tomorrow. Grout in the shower deals with a mess of moisture, soap, shampoo, body oils, dirt, minerals—you name it. All that exposure makes it one of the trickiest spots to keep clean. And because grout tends to be more porous than tile, it soaks up grime that sticks around long after you’ve wiped down the tiles themselves.
A solid grout-cleaning job starts with knowing what kind of grout you have and what’s actually making it dirty. Everyday grime, soap scum, hard-water stains, mold, and deep-set discoloration all need their own game plan. Your goal isn’t to blast away with chemicals—it’s to break up the crud without hurting the grout, the tiles, or anything else in your shower.
The right way to clean shower grout isn’t just about the scrubbing. Getting ready, working with care, rinsing well, and drying completely matter just as much. Tossing on more cleaner or scrubbing like mad can do more harm than good, especially if the grout’s already in rough shape.
KK Cleaning and Restoration offers professional tile and grout cleaning, sealing, regrouting, shower restoration, and caulking. When regular cleaning isn’t cutting it, or when the grout looks like it needs extra help, calling experts like these can really make a difference.
Why Shower Grout Gets Dirty and Discolored
Every shower leaves some grime behind—soap, shampoo, conditioner, body oils, minerals, plain old dirt. Over time, these messes build up, form a filmy layer, and start soaking into the grout’s pores.
Cement-based grout stains more easily than other types because it’s full of tiny pockets, thanks to its sand and cement mix. These little gaps let water and gunk soak in, not just sit on top.
Humidity only makes things worse. A damp shower gives mold and mildew plenty of time to get cozy. Poor ventilation, leaky fixtures, old sealants, and broken grout all let discoloration get out of hand fast.
So, cleaning shower grout the right way means managing moisture as much as it means tackling buildup. You need to wipe out what’s already there and make sure the surface can actually dry afterward if you want your efforts to last.
Know Your Grout Before You Clean
Before you reach for a cleaner, make sure you know what type of grout you’re dealing with. Most showers have cement-based grout, which is much more absorbent than epoxy grout. Epoxy is less porous and can handle different cleaning products, so don’t assume what works for cement will work for epoxy.
Check the grout’s condition, too. New and solid grout usually holds up to careful cleaning, but old, cracking, crumbling, or missing grout needs a gentler touch—or maybe repair, not cleaning.
Look at the tiles, too. Ceramic and porcelain are tough, but marble, limestone, travertine, and other natural stone can be sensitive to certain chemicals and abrasives.
When you’re not sure about the tile or grout type, don’t just guess—a pro’s opinion can save you from making a costly mistake.
Get the Shower Ready to Clean
People always skip this step—don’t. Clear out shampoo bottles, soap, razors, mats, and anything else in the way so you can reach every grout line.
Rinse the shower with warm water first. This loosens up some of the surface gunk and makes your cleaner work better since it doesn’t have to chew through loose debris right away.
Make sure there’s good airflow. Turn on the bathroom fan and, if you can, open a window to keep the humidity down.
Look over everything before you clean. Check for cracked grout, loose tiles, peeling silicone, leaks, stubborn dark spots, and puddles that just won’t dry up.
If you spot signs of deeper problems, cleaning alone won’t fix them. You might need restoration, regrouting, or new caulking.

Pick the Right Cleaner for Your Grout
Choosing the right cleaner is huge. It depends on the kind of grout, the tiles, and what exactly you’re trying to remove.
For regular cleaning on cement-based grout, stick with an alkaline or neutral cleaner. Acidic stuff can eat into cement over time if you use it a lot.
Don’t assume vinegar is always safe. Just because you see it in every cleaning hack online doesn’t mean it’s right for your shower—acids can damage both the grout and natural stone.
Stay away from oily or waxy cleaners on grout. They gum up the pores, attract more dirt, and leave the grout looking dirty again in no time.
Bottom line: Match your cleaner to your shower’s materials, not just the toughest bottle on the shelf.
Apply Cleaner and Let It Work
After you pick your cleaner, spread it on the grout lines—don’t drown the whole shower if you don’t have to, especially on the walls.
Give the solution some time to loosen up the grime before you start scrubbing. The cleaner needs to soak in to do its job.
Don’t let cleaning chemicals dry on the grout unless the label says it’s okay—dried cleaner can leave hard-to-remove residue.
Work in sections, not all at once. This keeps you in control and lets you spot any issues as you go.
Spray-and-wipe isn’t enough; controlled application and thorough agitation get better results.
Scrub Gently and Take Your Time
Once the cleaner has loosened things up, grab a grout brush or a medium nylon brush—nothing too rough—and scrub with small strokes. You want to work cleaner into the crevices, not destroy the grout.
Skip metal brushes or going at it too hard. Older grout especially can crumble, and you don’t want to create more problems.
Pay extra attention to spots like corners, edges, ledges, and anywhere bottles usually sit. These places stay damp and collect more mess.
If the grout’s really gross, it’s better to go over it gently a few times than to scrub hard all at once.
If the grout starts falling apart or cracking while you’re cleaning, it’s probably time for repair or replacement.
Remove Soap Scum and Body Oil
Soap scum forms when soap, minerals, oils, shampoos, and dirt combine into a waxy film on grout. Cleaners can break it up, but sometimes you need to let them sit and do some scrubbing.
Brush the grout well, since scum can sink into the tiny pores.
Clean the tiles too, not just the grout. Otherwise, you’ll rinse the leftover sludge from the tiles right back onto the grout you just cleaned.
Rinse everything with clean water—maybe even a couple of times if there was a lot of gunk.
If the shower feels sticky or filmy afterward, keep rinsing. Leftover cleaner makes all your hard work pointless.
Handle Mold, Mildew, and Dark Grout
Dark stains on grout aren’t always mold—it could just be dirt, soap scum, minerals, or permanent stains.
If you think mold’s involved, think about moisture. A shower that doesn’t dry out will get stained, no matter how often you clean it.
Use the right product for your grout and tile. Don’t ever mix different cleaners—especially not bleach with acids.
If the dark stains keep coming back, look for bigger problems. Bad silicone, leaks, ventilation issues, or water getting in from somewhere can all make mold or stains return.
Calling in professionals can help figure out if you’re dealing with removable stains or if you need real restoration.
Remove Hard-Water Deposits Carefully
Hard water leaves behind chalky, cloudy deposits that look white or gray on grout and tile.
These can be tough to get rid of and need a cleaner that won’t damage your particular tile or grout. Some strong mineral removers work but can eat into cement or stone, so be careful.
Never just reach for the most aggressive descaler. Test products carefully and read all instructions.
If your shower has natural stone or lots of buildup, pros can help without risking permanent damage.
Wipe down your shower after use, and you’ll make mineral stains a lot less likely next time.
Rinse, Extract, and Dry—Don’t Skip These
Rinsing is crucial—you’re not just wetting things down again, you’re getting rid of all that loosened dirt and leftover cleaner.
Go over everything a couple of times if needed. Don’t let dirty rinse water dry back onto the surface.
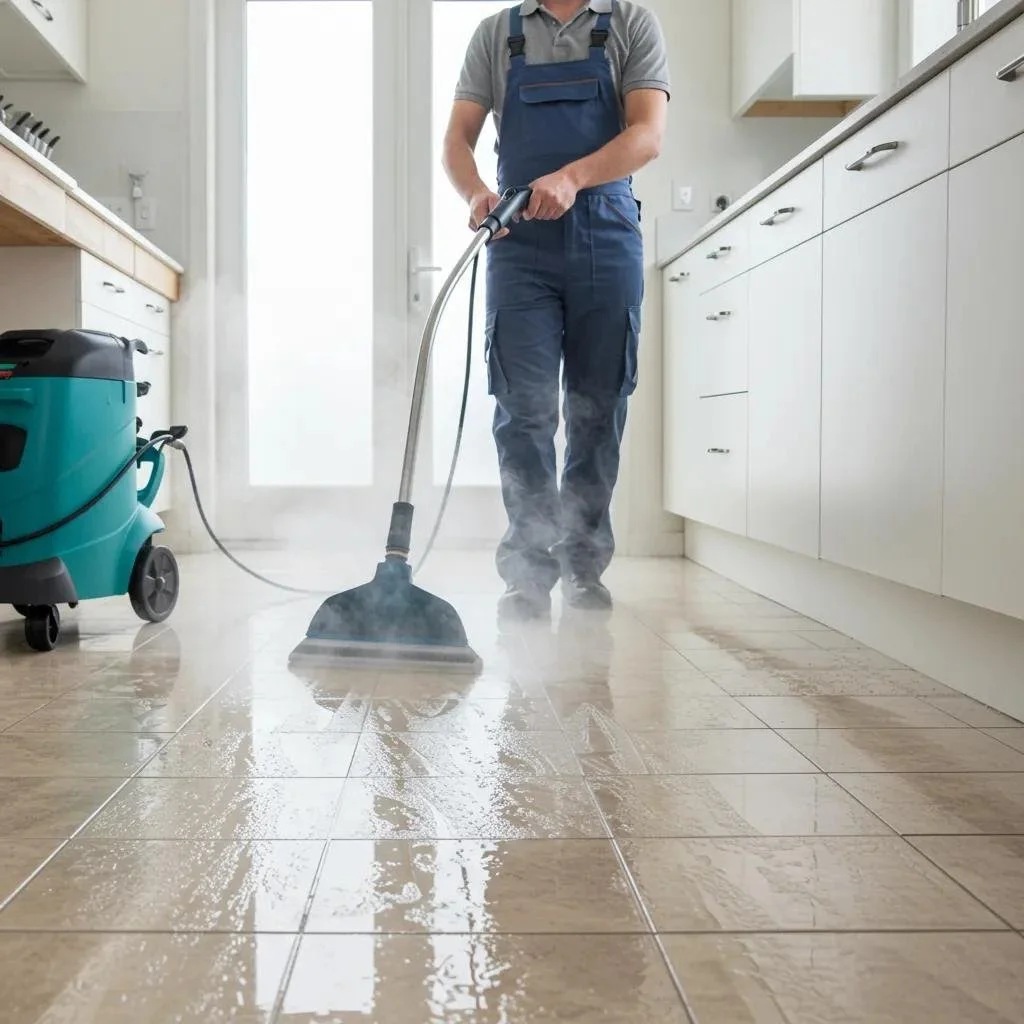
If you’ve got the tools, professional extraction sucks up contaminated water better than just wiping with towels.
After rinsing, dry everything with fresh microfiber towels or another drying method. Letting grout stay wet right after cleaning can lead to more problems and blur the results.
A clean, dry shower makes it easy to see if you need any more restoration or if sealing is your next step.
Don’t Fall Into These Grout Cleaning Traps
A lot of people think stronger chemicals and more scrubbing always mean a cleaner shower. That’s not true—you can damage grout, tiles, and sealants this way.
Using too much acid on cement grout is a classic mistake. So is using aggressive scrubbers that tear up the grout surface.
Oily or waxy cleaners trap grime, and not rinsing enough leaves behind a sticky film.
Never, ever mix cleaning products—especially bleach and acids. Bad reactions can happen.
Finally, don’t keep scrubbing at grout that’s clearly falling apart. If it’s cracked, missing, or badly damaged, cleaning won’t fix it.
Knowing when to stop and get help is a big part of taking care of your shower.
Seal and Maintain Clean Grout
After you’ve cleaned and dried cement-based grout, sealing can really help. A good penetrating sealer keeps water and spills from soaking in and makes cleaning easier next time.
Don’t seal dirty or damp grout—you need it perfectly dry and clean for the sealer to work.
But sealers aren’t magic—soap, dirt, and oils still build up. Wipe down showers after use, ventilate well, and clean before residue gets out of hand.
Along with pro-grade cleaning and sealing, these habits keep your shower looking fresh longer.
When You Should Call the Pros
DIY cleaning handles light or average grime just fine. But if your grout has years of stains, is coated in stubborn soap scum, or has dark colors that don’t budge, it’s probably time to bring in pros.
Professional cleaners are also a good idea for delicate or specialty tiles—one wrong move and you can do permanent damage.
KK Cleaning and Restoration checks out your shower’s condition before recommending deep cleaning. If needed, they can seal, regrout, redo caulking or silicone, and restore your shower.
They can also spot hidden problems—damaged grout, bad silicone, loose tiles, or stubborn moisture—that you’d miss with just surface cleaning.
Instead of cycling through stronger chemicals, it often works best to figure out the real cause and fix it the right way.
Professional Grout Cleaning by KK Cleaning and Restoration
Cleaning grout in the shower is a step-by-step process—pick the right cleaner, prep first, scrub with care, rinse well, dry completely, then keep up with maintenance. The aim isn’t just to make things look better for a week; it’s to really protect and clean the surfaces underneath.
KK Cleaning and Restoration helps homeowners beat soap scum, dirt, mineral deposits, and all kinds of buildup. They also spot when grout or caulking needs more than just cleaning.
If everything’s in shape, they can seal the grout for longer-lasting results. When grout is too far gone, regrouting gives you a fresh start, and failing silicone can be professionally replaced.
Keeping grout clean takes more than one deep clean. Stay on top of maintenance, fix water problems quickly, clean small messes before they grow, and every so often, get pro help.
With this kind of approach, even seriously dirty grout can look and perform much better—without resorting to tough chemicals or rough handling that does more harm than good.
Contact us now:
 Call us now at +16479163093
 Email: info@kkcleaningandrestoration.ca
 Visit: https://kkcleaningandrestoration.ca/
FAQs about the Best Way to Clean Grout in the Shower:-
1. What’s the best way to clean grout in the shower?
The best way is to figure out what kind of grout and tile you’re dealing with, pick a cleaner that works with them, and use a proper brush to gently scrub the grout. Let the cleaner sit long enough to break down soap scum, dirt, body oils, mineral deposits, and other grime before you start scrubbing. Afterward, rinse and dry the surface thoroughly so you don’t leave any leftover contamination or cleaner residue. If your grout’s really stained or hasn’t been taken care of in a while, a professional shower tile and grout cleaning gives a deeper restoration.
2. How often should I clean grout in the shower?
That depends on how much you use the shower, the ventilation, water quality, the grout’s condition, and how fast soap and mineral deposits build up. Regular light cleaning keeps dirt from getting deep into the grout. If routine cleaning isn’t making it look good, give it a deeper clean. Showers used a lot or with poor ventilation need cleaning more often than a lightly used bathroom.
3. What’s the best cleaner for shower grout?
The best cleaner depends on your grout type and the buildup you need to tackle. Neutral or alkaline cleaners work on many cement-based grouts, but if you’ve got heavy soap scum or tough stains, you’ll need something more specialized. Acidic cleaners aren’t always the answer — they can damage cement grout and some natural stones. The trick is to match your cleaner to the problem and material, rather than just grabbing the strongest stuff.
4. Can baking soda clean shower grout?
Baking soda can loosen light surface dirt and acts as a gentle abrasive, but only on the right grout. It’s fine for regular upkeep, but won’t fix grout that’s badly stained, falling apart, or affected by mold. Scrubbing too hard with abrasives can wear down weakened grout. For tough buildup, professional cleaning beats repeated DIY treatments.
5. Is vinegar the best way to clean grout in the shower?
Vinegar gets tossed around as a grout cleaner at home, but it’s not always safe for every shower or grout type. It’s acidic, so it can mess with cement grout and damage acid-sensitive stones like marble, limestone, and travertine. Repeated use can create surface issues without solving deeper stains. So, pick your cleaning product based on the grout and tile material, don’t just assume vinegar is a safe go-to.
6. How do I remove soap scum from shower grout?
Put a grout-safe cleaner on the soap scum, let it soak in, then gently scrub with a soft or medium nylon brush — really focus on spots where soap, shampoo, and oils build up. Rinse with clean water so you don’t let the residue or cleaner dry back onto the surface. Serious soap scum might need pro cleaning with special products and extraction.
7. What’s the best way to clean black grout in a shower?
Black or dark grout can be caused by mold, mildew, dirt, soap, minerals, or permanent stains. Figure out the cause first. Clean with an appropriate grout cleaner and gentle scrubbing — don’t just grab the strongest chemical right away. If the grout stays dark after a good scrub, it might be permanently stained or damaged. A professional can tell you if deeper cleaning, restoration, or regrouting is necessary.
8. Can I use bleach to clean shower grout?
Bleach can work in some cases, but it’s not always the best choice. It depends on the grout, tile, and the type of contamination, and using harsh chemicals repeatedly can wreck some surfaces. Never mix bleach with vinegar, acids, ammonia, or other cleaners — it’s dangerous. Always follow the manufacturer’s instructions and make sure the bathroom’s well-ventilated.
9. How do I remove mold from shower grout?
To get rid of mold, clean the visible growth and deal with moisture issues so it doesn’t come back. Use a product that’s safe for your tile and grout, scrub gently, rinse, and dry the shower thoroughly. Persistent mold can mean poor ventilation, leaking fixtures, bad grout, or deteriorated silicone, not just surface dirt. If mold keeps showing up after cleaning, consider professional restoration.
10. Can steam cleaning be used on shower grout?
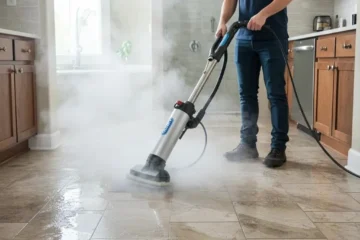
Steam cleaning can loosen certain dirt, soap scum, and buildup on suitable grout and tile, but it’s not right for every material. Some natural stones, specialty finishes, sealants, or grout systems need other cleaning methods. If the grout’s damaged, heat and pressure aren’t a repair. Professionals can decide whether steam, chemicals, brushing, or a combo works best.
11. What’s the best way to clean grout in the shower without damaging it?
Start with the gentlest method that gets rid of the buildup. Use a compatible cleaner, let it sit, and scrub softly with a proper brush. Don’t use too much force or metal tools. Test new products in a small spot first. This careful approach keeps the grout intact and cleans it effectively.
12. Why does my shower grout get dirty again after cleaning?
Grout gets dirty quickly because showers constantly expose it to moisture, soap, shampoo, oils, minerals, and dirt. Poor ventilation and standing water speed up discoloration and moisture issues. Not rinsing well can leave cleaner residue, which attracts more grime. Regular maintenance, good ventilation, drying after use, and professional cleaning help keep it cleaner for longer.
13. How do I clean white grout in a shower?
White grout needs regular upkeep since even a little dirt or residue creates noticeable stains. Use a fitting cleaner, follow instructions, and scrub gently with the right brush. Rinse and dry so you don’t leave cleaning residue behind. If white grout stays stained after proper cleaning, look into professional restoration or regrouting.
14. How do I clean shower grout with hard-water stains?
Hard-water stains are leftover minerals after water evaporates. The cleaning method depends on the type of deposit and the grout or tile material — some acidic descalers can harm cement grout or natural stone. Don’t assume strong limescale removers are safe for every shower. Professional cleaning can help figure out the right approach for tough mineral buildup.
15. Should I seal grout after cleaning it?
Sealing helps protect porous grout once you’ve cleaned and dried it thoroughly. A good grout sealer makes stains easier to handle but doesn’t replace regular cleaning. Sealing dirty or damp grout can trap moisture or contamination. For best results, get professional cleaning before sealing — if your grout’s the kind that needs it.
16. Can professional cleaning remove deeply stained shower grout?
Professional cleaning gets rid of a lot of dirt, soap scum, mineral deposits, and other surface gunk if the grout’s still solid. Pros use specific solutions, proper brushes, rinsing, and extraction. But permanent stains or badly deteriorated grout won’t always come back just from cleaning. If deep cleaning doesn’t work, regrouting or restorative work might be necessary.
17. What tools are best for cleaning shower grout?
A nylon grout brush is great — it reaches deep joints without needing dangerous pressure. Microfiber cloths help wipe tiles, remove gunk, and dry everything. A handheld shower sprayer or other rinsing method helps remove loosened dirt and cleaner. Combine your tools with the right cleaners and method; don’t just rely on scrubbing.
18. What should I avoid when cleaning shower grout?
Skip metal brushes, heavy pressure, incompatible chemicals, and cleaners that aren’t right for your tile or grout. Repeated acidic products are rough on cement grout and acid-sensitive stones. Oil or wax cleaners leave residue in porous grout that attracts dirt and complicates future cleaning. Never mix chemicals, and always follow product instructions.
19. When should shower grout be replaced instead of cleaned?
Swap out grout if it’s cracked, crumbling, missing, badly deteriorated, or isn’t holding tiles together. Cleaning removes dirt but won’t fix grout that’s physically broken. If it stays discolored after pro cleaning, consider replacing, based on the cause and condition. A professional can assess if cleaning is enough or if regrouting makes better sense.
20. How can I keep shower grout clean after deep cleaning?
After deep cleaning, remove excess water from walls and floors with a squeegee or microfiber cloth. Make sure your bathroom is well-ventilated so the shower dries fast. Clear away light soap and mineral buildup regularly instead of letting it pile up. Pair these habits with periodic professional cleaning and sealing to keep your grout looking good longer.
21. When should I hire a professional for shower grout cleaning?
Go pro when you’ve got heavy grout staining, thick soap scum, persistent mold, stubborn mineral deposits, or buildup that you can’t remove at home. It’s also wise if your shower uses natural stone or specialty materials that need careful cleaning. Pros can tell if dirt is just surface-level or if there’s damaged grout, caulking issues, or moisture problems. KK Cleaning and Restoration offers professional shower tile and grout cleaning, sealing, regrouting, caulking, and restoration, depending on your shower’s needs.
22. Why choose KK Cleaning and Restoration for shower grout cleaning?
KK Cleaning and Restoration provides professional tile and grout cleaning to tackle dirt, soap scum, mineral deposits, stains, and general buildup. The best way to clean grout depends on your tile, grout, contamination, and the condition of the installation, so a professional assessment helps avoid mistakes. If cleaning isn’t enough, they offer grout sealing, regrouting, caulking or silicone replacement, and shower restoration to solve underlying issues. With their help, your shower looks cleaner and stays easier to maintain in the long run.
Contact us now:
Call us now at +16479163093
Email: info@kkcleaningandrestoration.ca
Visit: https://kkcleaningandrestoration.ca/